Installation
Table of Contents
The Actifsource VS Code Extension is a frontend which connects via SSH to a backend which is currently just the Actifsource Eclipse Plugin. In the future this backend will run headless.
Setup the Backend: VS Code Extension
For the backend installation, follow the steps as described for the Actifsource Eclipse Plugin.
Then activate the Resource Access in the Eclipse Preferences (Window>Preferences):
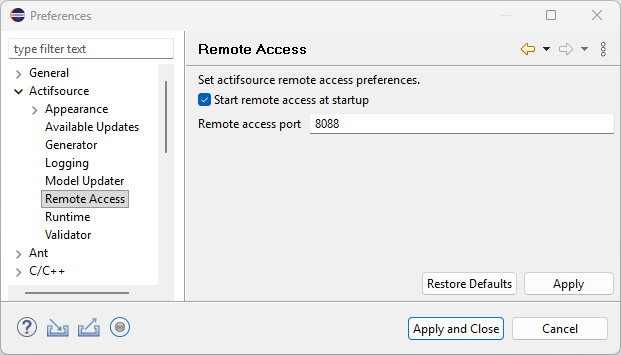 Then the server will start automatically when you start Eclipse.
Setup the Frontend: VS Code Extension
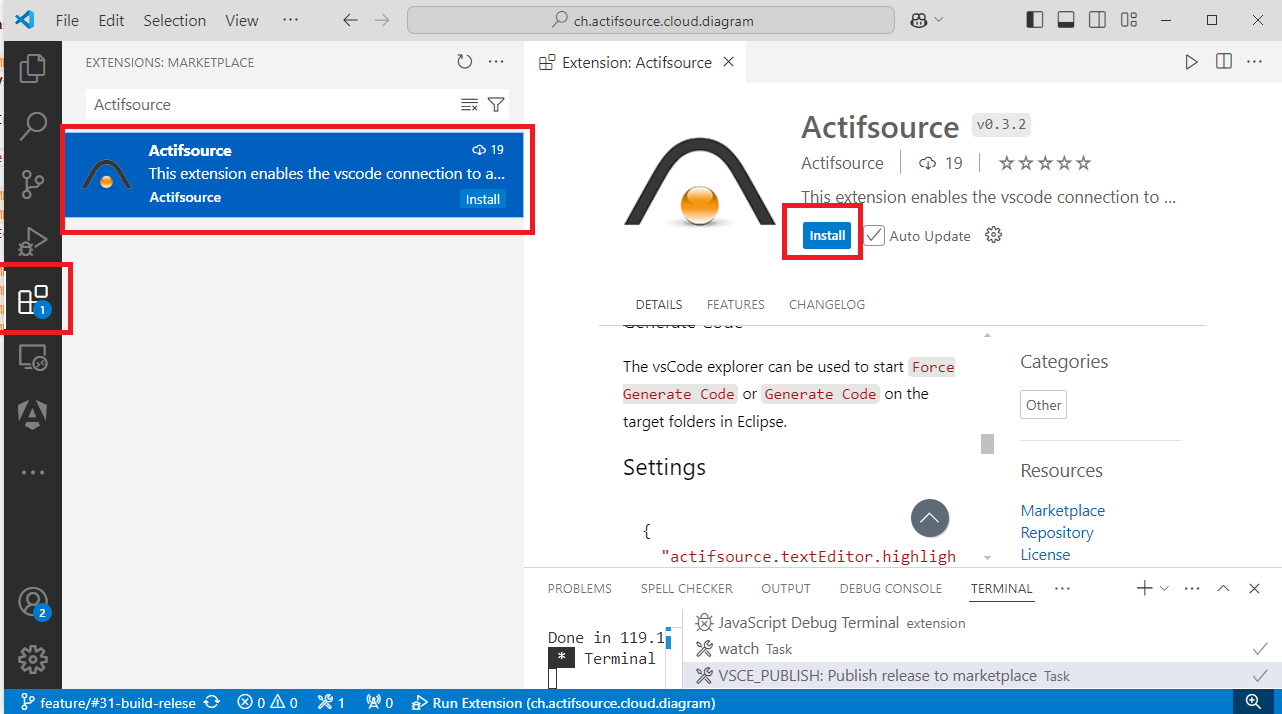
Go to the Extensions tab in VS Code, search for “Actifsource” and install it from there.
Setup Connection between Frontend and Backend
Setting up a workspace:
- Start Eclipse with a workspace.
- Configure Eclipse
Windows->Preferences
- Restart Eclipse with the same workspace.
- Create an Actifsource project in this workspace.
- Open VS Code
- Open the eclipse workspace folder in VS Code via
Open Folder. - Add the following settings to
.vscode/settings.json:
{
  "actifsource": {
    "resourceAccess": {
      "host": "localhost",
      "port": "8085",
      "autoConnect": true,
    },
  },
}- Restart VS Code.
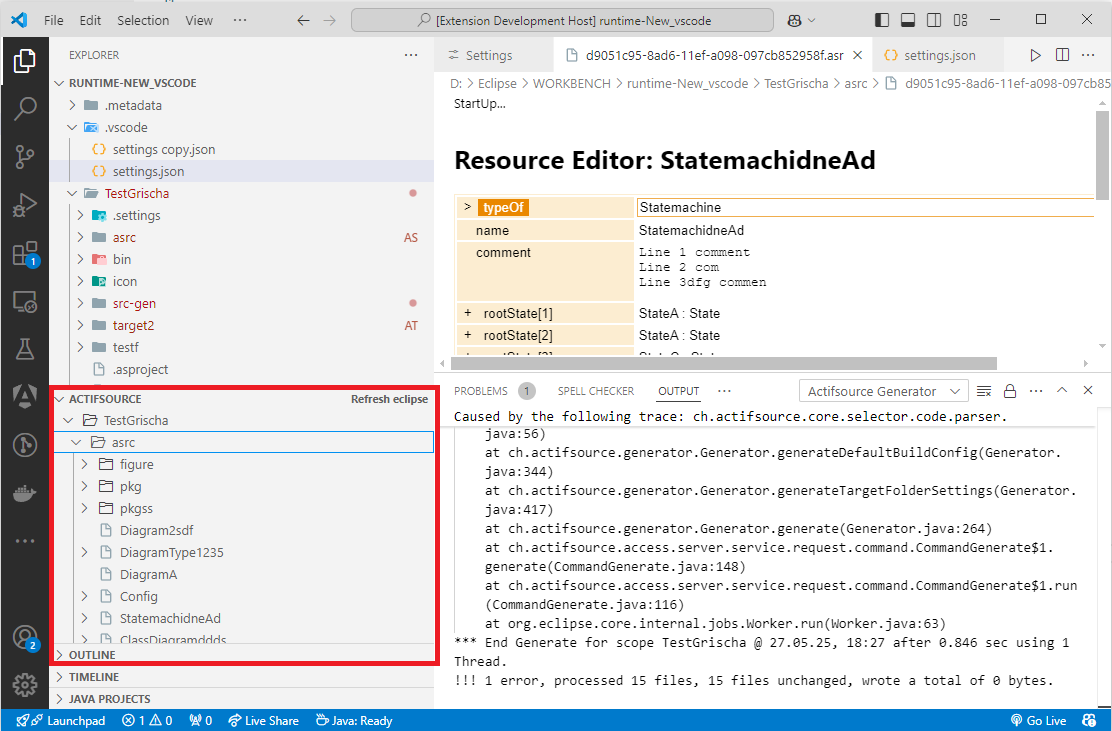
- Now the connection to eclipse should be established and the Actifsource tab should show the project.
Note: The interface between frontend and backend is versioned. If a interface version mismatch error comes up, you might update the Eclipse Plugin on the backend, or, if this is not possible, then downgrade the frontend to an earlier version.
Connection settings
Host and port must match Remote access port of the Eclipse preference page Actifsource - Remote Access. Start remote access at startup has to be enabled there too.
| Setting | Default | Meaning |
|---|---|---|
actifsource.resourceAccess.host |
localhost |
Host of the Actifsource server |
actifsource.resourceAccess.port |
8088 |
Port of the Actifsource server |
actifsource.resourceAccess.autoConnect |
true |
Connect automatically |
actifsource.resourceAccess.protocolVersionCheck |
true |
Check the API version when connecting |
Connecting
With autoConnect everything connects when it is opened. Without it nothing connects until
Actifsource: Connect Resource Access is executed. From then on all further editors and views
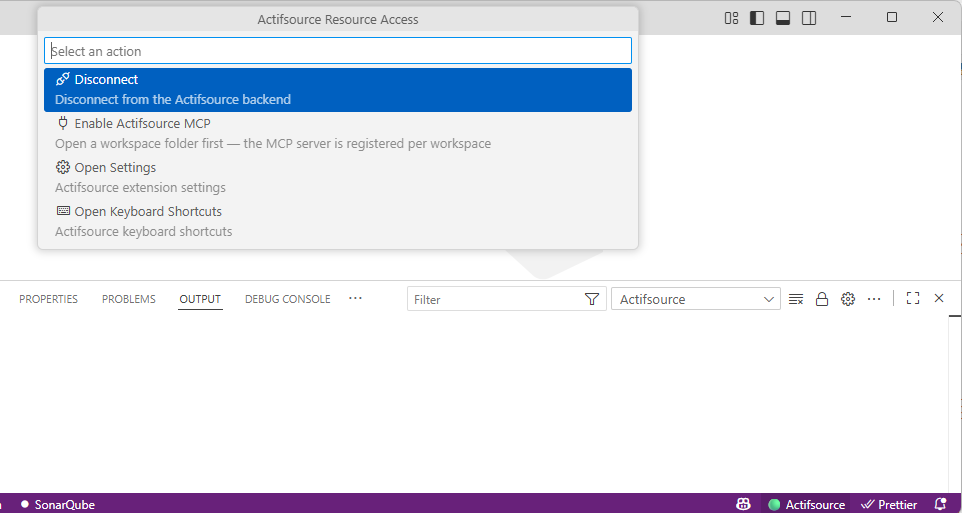
connect too. Actifsource: Disconnect Resource Access and a window reload end that again.
The Actifsource status bar item runs both commands. It shows the state and the address as a tooltip:
| Status bar | Meaning |
|---|---|
| 🟢 Actifsource | Connected |
| 🟡 Actifsource: Connecting… | The connection is being established |
| 🔴 Actifsource: Error | The connection failed |
| ⚪ Actifsource: Disconnected | Not connected |
When the connection fails
There is no automatic reconnect. A dialog reports the loss and offers Retry. Retry reconnects every editor and view. The dialog appears as well when a request is sent while no connection exists.
With protocolVersionCheck the connection is refused when extension and backend speak a
different protocol version (Invalid rpc protocol version …). Update the older of the two.